
VEX IQ Crossover. Two hex balls with an extended attachment. Part 1
In this robotics tutorial, we present a solution to extending a VEX IQ attachment to handle two hex balls at a time
- #532
- 06 Jun 2017
In this robotics tutorial, we present a solution to extending a VEX IQ attachment to handle two hex balls at a time
In this video tutorial we demonstrate the user of a quick 'pinless' attachment. As all pinless attachment it is not that they are completely pinless, but that they do not require the "click" of the pins that is often difficult to achieve in a quick pace environment as during FIRST LEGO League competition rounds.
In this video tutorial we demonstrate how the robot could accomplish the Power Switch mission. Power Switch consists of a cube with a lever and the lever should be rotate to 180 degrees. This mission model was very close to a FIRST LEGO League 2012 competition mission which was called - Oven. The robot, the attachment adn the mission model are built form a single LEGO Mindstorms Robot Inventor 51515 set and with the tutorial you will learn how to use an active attachment with 2 gear wheels to complete such missions.
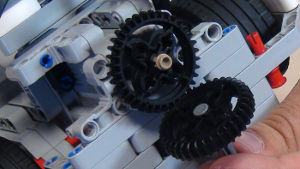
Pinless attachments are smart and quick and could make a big differences between two robot constructions. In this video we are sharing a nice idea for a pinless attachment placed below the robot.
Third, and last video of this series on how to use ONE attachment to solve the FLL 2014 World Class missions.
Remember the passive/active attachment separation that we are making at FLLCasts.com. This applies for all the attachments and in this Episode, we are looking at how to use a passive attachment.
This is a 10 out of 10 video tutorial demonstrating the consistency and reliability of a configurable attachment. The attachment is designed to accomplish the FIRST LEGO League 2021-2022 Cargo Connect mission model called Sorting Center. The mission model has 3 cargo objects that could be placed in a different way. The attachment is configurable and before the run we configure it for the specific way in which the mission model is set up before the start of the round.
The robot attachment build in this tutorial gives an idea on how to release a rubber band at a specific moment using a motor. It's a simple, but yet powerful technique on using rubber bands.
This is the first Active Pinless Attachment for the Box competition robot. The attachment is placed on the top of the robot and is controlled by one of the motors.
Based on feedback from many of you in this episode I would like to show you how to build an active attachment that changes the orientation of a gear wheel placed vertically to a gear wheel placed horizontally. This attachment could be used in competitions and shows a basic principle of changing the orientation. All attachments could follow the same principle.
Sometimes the way an axle is placed is just not suitable for a certain attachment and you should transfer the motion to another axle a few LEGO units above the current.
This one is very special- an attachment that could lock itself on purpose while working.
In this video tutorial, we push two of the mission models with a pinless active attachment with gears. The goal is to push the mission models after the blue lines. This attachment is interesting as it demonstrates a non-straightforward idea of how we can push the mission models. We explain the Scratch program and how we use the motion sensors - you will learn how to turn to a specific angle by using the motion sensor.
Second active pinless attachment for the robot construction. It is placed in the top/right corner of the robot and includes an interesting gear system for transferring the power. The attachment is suitable for complete rotations.
In this tutorial we will go through a solution for three of the missions from 2012 FIRST LEGO League competition using only one attachment. By accomplishing the medicines, strength exercise and cardiovascular missions we earn 55 points. You can download the programs from the link in the Materials tab.