In this video tutorial, we push two of the mission models with a pinless active attachment with gears. The goal is to push the mission models after the blue lines. This attachment is interesting as it demonstrates a non-straightforward idea of how we can push the mission models. We explain the Scratch program and how we use the motion sensors - you will learn how to turn to a specific angle by using the motion sensor.
- #2043
- 18 Oct 2022
- 7:24
- LEGO Education SPIKE Prime
- Push, FIRST LEGO League, FIRST LEGO League 2021-2022 Cargo Connect, Attachments, Gears, Scratch, LEGO Education SPIKE App Word Blocks 2, Pinless, Sensors, Motion Sensor, Gyro Sensor
English
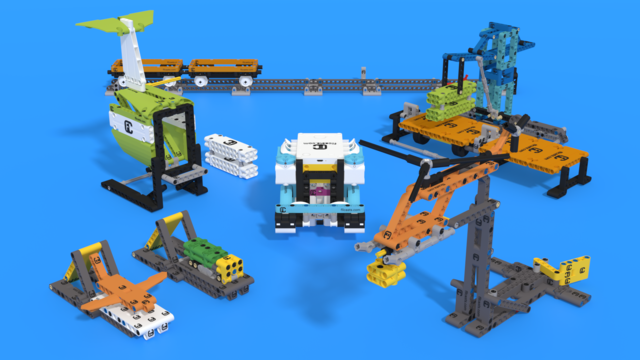
In this video tutorial, we accomplish the cargo transportation mission from FIRST LEGO League Cargo Connect. This here is the truck in this mission. And this mission consists of two mission models. This year is the truck that goes to to transport this truck above the blue line. So we should somehow manage to get this truck after the blue line. We can push it, we can pull it, we can do whatever we want, but it should be after the blue line. For this, we are using the LEGO Education SPIKE Prime robot that would build for this course. Let's see how it goes.
We start
move forward and for this mission we've decided to use an attachment that will push on the mission model itself, the truck. But it will not push on the mission model where the yellow part is. So we've decided to accomplish the mission in a slightly different way. Move forward and after we push the truck, we use the robot again. The second part of this mission is to push on the airplane, this orange airplane right here. And the goal mission is the same. To get the airplane after the blue line. That's it. We must interact with the mission model in some way to get the airplane after the blue line.
Can we accomplish both of the missions in the same run? Probably. For this mission model we decided to use the same attachment and the same principal mechanism, but in a slightly different way. Just to demonstrate that you can push/pull such attachments in many different ways. Here we approach the mission model and we try to use the attachment. Now, sometimes it doesn't work when we are not aligned correctly. Sometimes it works perfectly well. When we have such mission, it's important to somehow decide on the strategy of how do we accomplish them, especially when there are two of them. On the right we have the recording of the robot. On the left we have the program. In this program, it has two programs inside. One is for when the left button is pressed and one is for when the right button is pressed because it's for the same mission. Although the mission contains two mission models, first mission model, the truck. Second mission model, the plane. When we press the left button, we are starting the program for the truck. When we press the right button, we are starting the program for the plane. So how does the program for the truck works? Initially, we set yaw angle to zero because it will use this angle to detect the rotation of the robot. Motor D is where our attachment is connected. So we set motor D to speed 20% and to position zero. Then we initialize the motors movements A and B, which are the driving motors, and we set the speed to 30%, which is fine for our case. Slow acceleration and move forward for 20. Start view. Here is the initialization and we are now in The Block move with 20 CM Forward. Now, as we stop, we execute the next one move with motor D for 1 second. After we move with motor D for 1 second, we change the behavior of the robot. We set movement speed to 100%, which means we should be quite fast when we are pushing because we want to push on this truck. And acceleration is as a default. And in the same time, we start moving, we start rotating the robot and we rotate the robot until the yaw angle is less than -75, which means it Is -80 -90 that's what we need to do. We need to rotate with the robot and to push on the truck in order for truck to move after the blue line. After we rotated the robot to less than -75 degrees, we stop moving. We take the attachment back up. We go to position zero. Counterclockwise. And then what we do is we try to push on the truck with the robot. Movement again. 30%. Because now it's not important to be that fast. Acceleration slow and we move forward for 5 CM, backward for 5 CM. We just move forward, backward in order to push the truck after the blue line. How does it work? Forward, backward, and then we start moving and rotating with the robot in the opposite direction until the yaw angle is more than minus five degrees, which means it's about zero degrees. And when it is about zero degrees, we will stop and we'll get the robot back. Here it is. We are now in the process in this. Start, wait until where we are waiting with the sensor until the robot detects more than minus five degrees. This here is the moment. And we stop. And now we move backwards.
That's It. That's the program. And that's how this program works. What I would suggest now is for you to download the program and build the robot. Build the attachment and to try to replicate the behavior of the robot with this mission model. There are a couple of things that you can learn from it, and it's quite useful as a principle of how we push on the truck so so that it can move beyond the blue line. Hope this is helpful. See you in the next tutorial.
Courses and lessons with this Tutorial
This Tutorial is used in the following courses and lessons
FIRST LEGO League 2021-2022 Cargo Connect solutions and review with LEGO Education SPIKE Prime
In this course, we demonstrate and explain example solutions for the FIRST LEGO League 2021-2022 Cargo Connect competition. Just like every year, we share solutions only after the season is over. In this course, you will find examples and principles of building attachments and will learn how to program consistent and reliable robots for each mission. You can follow the course, and as you go through each mission, try to replicate the solutions to understand the programs and explanations. Upon completion of the course, you will have many new ideas about how to approach the missions in every FLL robotics competition and how to help your team score more points.
Before starting this course, we suggest you go through the FIRST LEGO League robot game guide
- 55
- 181:18
- 34

M04. Push with an attachment - Transportation Journey
In this video tutorial, we push two of the mission models with a pinless active attachment with gears. The goal is to push the mission models after the blue lines. This attachment is interesting as it demonstrates a non-straightforward idea of how we can push the mission models. We explain the Scratch program and how we use the motion sensors - you will learn how to turn to a specific angle by using the motion sensor.
- 3
- 1
- 2
- 3d_rotation 4