
EV3 Pinless Attachment Example program for episode 64
The first example program in the episode.
- #8sep2a
- 07 Dec 2014

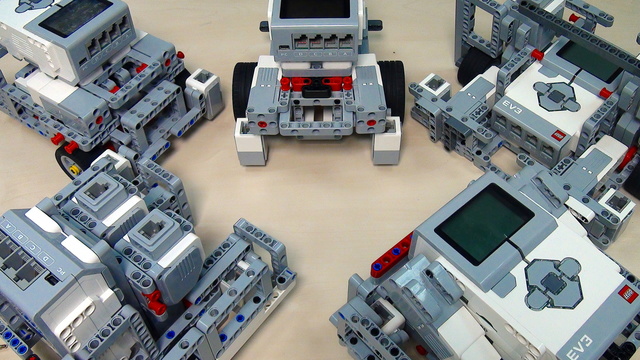
The Sports Utility Vehicle box robot is the new marvelous box robot that we've created. It is designed for teams that would like to learn how to build balanced, stable and working robot chassis following our box principle. It is smaller and easier to build than box robot 1 and it is more simple than box robot 2.
The main advantages of this robot compared to previous box robots are
- motors in the right direction, so when rotating the motor forward, the robot moves forward.
- it is much easier to attach attachments. There are 4 different gears on which you could attach attachments.
- it has a large clearance - which means that it could move over obstacles.
Of course, it has a Gyro and two Color Sensors. Not only that, but we have all the cables shown in the construction.
The SUV Box robot is design to be used with a Gyro sensor and two Color Sensors for alignment. It is not working well for following lines as the sensors are very high and they are very high to allow for high clearance of the chassis. If you need to follow lines we recommend the Dominator X-Y robot
- [How NOT To] Build An Active Attachment For SUV Box Robot
- Simple Pinless Attachment for the SUV Box Robot

Introducing Kufar! In Bulgarian, Kufar means "suitcase," and just like a suitcase, this robot is easy to "pack" with different attachments for each task.
Unlike traditional box robots, Kufar is an "out-of-box" design, enabling fast, easy attachment swaps. This flexibility allows teams to build a new chassis with customized attachments for each run, making transitions quick but requiring more parts and careful handling due to its gear transmission, which can sometimes cause gear slippage or play.
To improve precision, Kufar’s gear transmission is optimized for lower speeds. Kufar also includes a color sensor to detect specific colored bricks on attachments and a force sensor to start corresponding programs. With two motors for movement and one for attachments, Kufar is compact, efficient, and easy to handle, especially with its sturdy top handle.
We thoroughly enjoyed exploring this innovative concept and hope you find it equally fun and inspiring!

Probably the simples trick for pinless attachments that we've found. It is a construction build in just three steps. Simple as that. But it has a lot of potential to teach you how to use pinless attachments. Pinless attachments are very useful during FIRST LEGO League and World Robot Olympiad competitions.

The Chain Monster is one of the coolest Box Robots that we've built. But what is a robot without attachments that can accomplish missions? These here are 3D building instructions demonstrating how the frame for the robot could be built. We've discussed frames in the Box Robots courses for EV3. Take a look at this one. See if it can inspire you to build robots and attachments in certain way to achieve consistent and reliable robot behavior.

This is an attachment that accomplishes a mission. But they all do. This attachment is special as it is a Glide pinless attachment. It teachers the principles of building attachments that could be easily glided onto the robot and allow for quick changes of different attachments. It is designed for the

The MiniBox box robot features a unique design with three perpendicularly rotating gearwheels, which simplifies the attachment design process. This setup allows teams to easily create and connect attachments on multiple sides, making it quick to adjust the robot for various tasks.
Its structure includes walls with a maximum attachable surface area, offering flexibility in attachment placement. This extensive surface allows for secure connections, so teams can experiment with different attachment configurations.
The MiniBox’s compact size is best suited for smaller, lightweight attachments. When working with larger attachments, its balance and stability can be affected, limiting its effectiveness in tasks that require more substantial setups.

Our goal with this course is to do a recap of FIRST LEGO League 2018-2019 Into Orbit competition. We'll show different solutions for some of the missions along with discussion on the approaches. We hope that a recap like this could help team prepare for next year. With available building instructions, ready to use programs this course is perfect for exercise on the missions from the competition.

The goal of this course is to take you through some of the most useful principles for building and using attachments to accomplish missions at FIRST LEGO League competitions. The whole course is based on a LEGO MINDSTORMS Robot Inventor and you need a single 51515 set and without additional parts (you will need a second color sensor for the lessons for using two color sensors, but feel free to skip them if you don't have it). For every mission there is a Scratch and Python program attachment. The course consists of 25 lessons suitable for beginner and advanced students. Every lesson consists of a video tutorial demonstrating the principle and how the mission could be accomplished along with building instructions for the robot, the attachment and programs for controlling the robot.


"The devil is in the details". We are improving the Rubber band attachment with a Flywheel by introducing a few small, but important modifications that make the whole robot attachment more stable and reliable. With the conclusion of the series this attachment could be used as a basis for some very interesting STEM demonstrations on energy accumulation and conservation.

On every FIRST LEGO League competition and generally robotics competitions with LEGO robots, we build attachments to accomplish missions and we must accomplish the missions in a limited amount of time. Most of the time we can not accomplish the missions with a single attachment and we have to change attachments. This is where building robot attachments that are easy to remove really makes sense. In this tutorial we discuss some of the things that should be considered in the building Easy to Detach modules and attachments

In this tutorial of the series we would get into more details on how the flywheel works, what's its purpose and how the whole attachment is triggered with the first rubber band.

The third part of the series the goal is to extend the robot attachment so that we could solve the second part of the FIRST LEGO League World Class mission challenge - to take the loop.
This course if used by teams, mentors and students to structure the preparation for the Robotics Game of the FIRST LEGO League Robotics Competitions. One thing that is common each year at FLL is that experience matters a lot. Our goal with this course is to quickly bring new teams up to speed with experienced teams and to share some new tricks, patterns, constructions with the more experienced teams.

In this course, we demonstrate and explain example solutions for the FIRST LEGO League 2022-2023 SUPER POWERED competition using the Kriket box robot as a base and building attachments for it. Every year, we share our solutions and our comments only after the season is over. The course is centred around MULTIPLE MISSIONS in a single run which is unique. We see runs with 3, 4 and even 5 missions. Then we enter into details around accomplishing the specific missions. You can follow the course, and as you go through each mission, try to replicate the solutions to understand the programs and explanations. This teaches students and teachers the principles of accomplishing missions in every FLL robotics competition and how to help your team score more points.
Before starting this course, we suggest you go through the FIRST LEGO League robot game guide
There is an additional course that does a review for the same competition but with a different robot - the Chain Monster. It present other principles of building attachments and shows different examples. Check out the other course also. FIRST LEGO League 2022-2023 Super Powered solutions and review with Chain Monster box robot from LEGO Education SPIKE Prime