

Improving FLL Robot Game. Teacher Note. The robot base for lifting
Note for the teacher on how to organize the class to use different robot base constructions to accomplish the mission for lifting.
- #441
- 06 Mar 2017
Note for the teacher on how to organize the class to use different robot base constructions to accomplish the mission for lifting.

As an extension to the previous video we talk about the Hi Technic Color Sensor again.

Many times we just upload blocks and leave it up to you to use it. In this tutorial, I would like to show you how to use the implemented blocks. How to import them into the EV3-G software. How to see them in the palette. How to drag and drop them to build a working program.

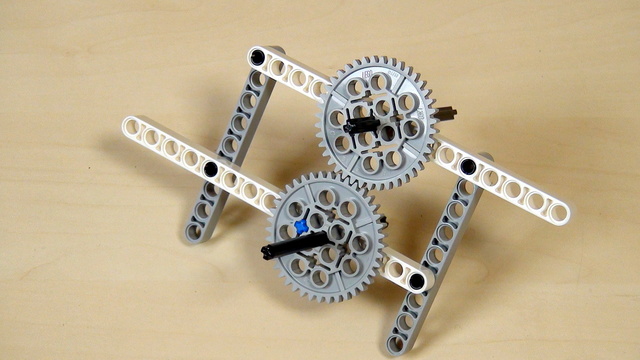
Build a similar mechanism to this one. Similar, but for your robot. This is the task for you. Try, give yourself half and hour or even an hour.

This third way of positioning the LEGO Mindstorms EV3 motors on the robot seems to be the most productive with the most advantages. We have named it "correct", but we completely understand there might be other even more efficient ways to position the motors on the robot.

Направете сами, коригирайте грешките в конструкцията на EasyBot-а.

In this tutorial we will go through a solution for three of the missions from 2012 FIRST LEGO League competition using only one attachment. By accomplishing the medicines, strength exercise and cardiovascular missions we earn 55 points. You can download the programs from the link in the Materials tab.

The challenge for this video is to program a menu that is controlled from the LEGO Mindstorms EV3 brick screen.
One of the very common problems with the LEGO Mindstorms and LEGO Technic Gear wheels is then a tooth is skipped. In this video, I would like us to discuss this challenge and how do we solve it.

Днес ще ви запознаем с имената и употребата на частите в един стандартен робот.
Важно: Различаваме и разделяме частите по форма не по цвят.

How to organize the different robots and group of students when working on lifting the robot.

After we take each sample, we perform calculations and these calculations could take different time. It is important to know how much time does it take to perform the calculations. In this video tutorial, we would data log the time and plot the data.

Ще ви покажем какви са типичните проблеми, които правят учениците, когато строят робот.

This second way of positioning the LEGO Mindstorms EV3 motors on the robot leaves more space for the Mindstorms brick and for attaching a third motor. We are experimenting and showing the advantages and disadvantages of this particular construction.

We are showing the first way we could position the motors on the robot construction. This seems to be challenging for many robot builders and that's why we are going to do it in a few different ways in the next few video tutorials from the series.

In this video tutorial we would discuss the M13. OBSERVATORY mission from the FIRST LEGO League robotics competition 2018-2019 Into Orbit. This is an easy mission. You can accomplish it by pushing the level with the robot. The challenge is that there is not enough space to move with the robot around the attachment. Let's discuss how we could achieve it.

Overview of what is going to happen in module 3

Когато строите по инструкции, има някои често допускани грешки.

Let's implement a more advanced program for this robot to learn how to use with motors in opposite directions - and this is to implement the Proportional Line Following algorithm.

This video lesson shows a very interesting specific example on how to use the LEGO Mindstorms EV3 Ultrasonic Sensor. The sensor detects if the catapult is loaded or if we have just fired an element. At the end of the lesson I also offer an interesting challenge that you could use in your classroom or at home.

Нарочно откачете един от кабелите и наблюдавайте, какво ще направи робота.

We would see how both satellites work together on the World Robotics Olympiad competition. They must both follow different orbits and must cooperate for the mission to be accomplished.

Connect the attachment to the box robot and find the correct number of rotations of the middle motor that would bring the robot up and forward and would attach it to the mission model.

След като вече изпробвахте и се справихте с предизвикателство, включващо поредица от инструкции, искаме да ви представим някои добри практики.

Когато работите с ученици е важно да предадете очакванията си от тях в самото начало на курс.

Remember the passive/active attachment separation that we are making at FLLCasts.com. This applies for all the attachments and in this Episode, we are looking at how to use a passive attachment.

Ще ви покажем три възможни начина как да прехвърлите програмата си от компютъра в робота.