
Following a line with two Hi Technic Color Sensors in EV3
As an extension to the previous video we talk about the Hi Technic Color Sensor again.
- #99
- 02 Aug 2015
As an extension to the previous video we talk about the Hi Technic Color Sensor again.


We list the number of decisions that the robot is making while following the line. Then, we group them and decide on the number of sensors to be used.

In this video lesson I will show you how to follow a black line using just one sensor, but fast enough so that you could use it during any robotics competition without wasting any time.

We extract the Proportional Line Following algorithm into a new block with parameters. This allows us to experiment with the Threshold, Constant Speed and Relaxation Coefficient. You can now easily use the block in you other programs without having to implement it.

On of the most precise ways to position on the FIRST LEGO League and other competition fields is to follow and align and in this tutorial we demonstrate exactly this - how consistent and reliable this method is to reach specific mission models. In this way you know that every time you will be at the right place, which is great.
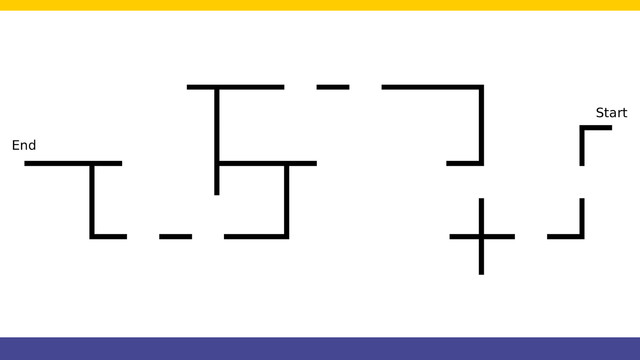
We start a course for following a line with crosses and gaps. This is a challenge that one of the users at FLLCasts.com was trying to accomplish and asked us for advice. We present the whole challenge to you step-by-step. But first, let's also see the whole run of the line following algorithm. With this course, we also do an introduction of using State Machine as a programming pattern.

It's inevitable. While following this gapped line we would reach a gap. The robot must somehow understand that there is a gap and must make a decision on what to do. For detecting the gap we use the Rotation Sensor. Not the most popular, but very convenient in many cases. Check out the video.

We've detected the gap. It's time to move over it. This is difficult because we have to detect where the line is after the 0.1 meters gap on the line following field.

In the first LEGO tutorial we started following a wall with the Ultrasonic Sensor. In this tutorial we would improve the program, remove the zig zag movement and make it very smooth.

In this 10 out of 10 tutorials we do 10 runs that demonstrated how consistent and reliable it is to stop at the second intersection. This is useful as it is one of the main ways to figure out how to position yourself on the field.
All worked as expected, up until know because the robot got lost. This happens when we turn right and the line does not continue to the right. Now the robot must somehow understand that it is "lost" and escape.

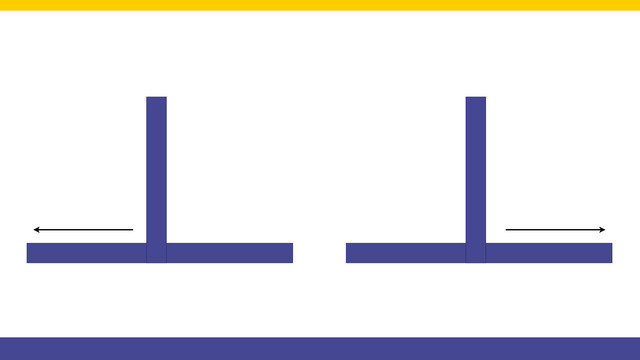
Follow an object using the LEGO Mindstorms Ultrasonic Sensor. Object moves away, the robot moves with the object. The program is very useful if you are doing STEM classes and you want to demonstrate results. People react very well to a robot following you like a dog for example.

In this video we are showing how to use two light sensors to do basic aligning on a black line. This is always needed at the competitions. We also show an example for following a line with two sensors.

Counting lines and stopping on the third is the subject of this video. It is important to know how to do this in order to conduct more than one experiment in STEM classes (if we consider that each line is an experiment)

This tutorial is about how to follow a wall with an ultrasonic sensor. The example is with a border from a FIRST LEGO League (FLL) competition, but could also easily be applied to other competitions and problems.