

Gapped & Crossed Line Following. Part 9. Crossed Sections
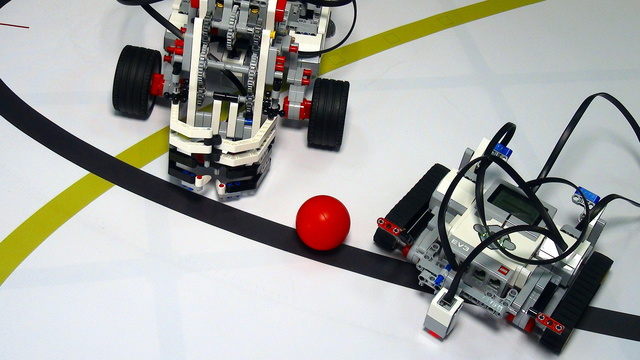
We can Turn Right. We can Turn Left. How do we decide which way to go if there are lines both to the left and to the right. Check out the video.
- #212
- 09 Mar 2016
We can Turn Right. We can Turn Left. How do we decide which way to go if there are lines both to the left and to the right. Check out the video.

This is a recording of a completely perfect, 10 out of 10 accomplishment of a two-part mission - Train tracks, from the FIRST LEGO League 2021-2022 Cargo Connect competition. Due to the proper use of motion and color/light sensors, the robot is 100% consistent and reliable for a non-trivial mission. Even when the robot makes a mistake, it auto-corrects and compensates for this mistake.

In this episode I would like to show you how to enable the communication between the computer and the NXT brick, through the USB and using the leJOS project. Starting leJOS on Windows is pretty easy. But starting the samples and achieving the communication is the actual problem.

This robot has a color sensor and this sensor is used for following lines. Additional Mindstorms EV3 sensors could be place on the robot, like a Gyro sensor or a second Color sensor.
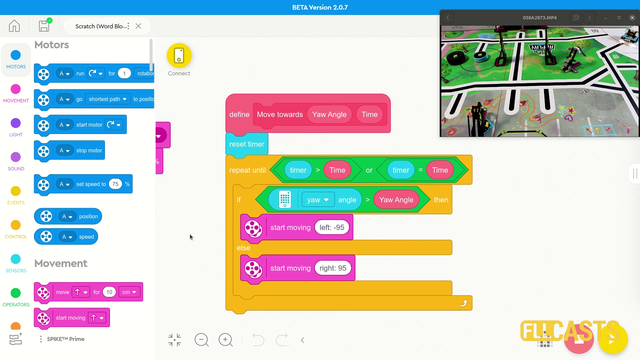
In this video tutorial we use the LEGO Education SPIKE Prime Motion Sensor to reach a mission model on the field. It's a basic use of the motion sensor that we will extend in the next few tutorials and in the same time we take the opportunity to demonstrate what a MyBlock is and how to develop one. As a result of this video you will learn how to make the program easier to read and maintain by organizing the blocks in the program in special MyBlocks that couple them all together.

Starting leJOS might be very problematic, since you need to install a few libraries and make some configurations. In this video tutorial I am showing a step-by-step guide on how you could install leJOS on your Ubuntu Linux. And it is quite easy.

Take the hacksaw, the drill and let's cut the pipe.

In this video tutorial, we accomplish a FIRST LEGO League mission called The Bridge. We demonstrate how to use a really simple active attachment where the goal of the mission is to push down both parts of the bridge. We do not enter into the programming and we leave it up to you as an exercise.
Starting with the World Robotics Olympiad 2014 Junior-High challenge we first catch the object on our path. We discuss a good mechanism for catching and lifting balls that can do two movements with one motor.

Would you like to resolve all the problems with the light/color sensors that you have? And to make all of them work in a predictable, stable way even when using more than one MINDSTORMS colour sensors.
When using Color sensors it is important to calibrate them depending on the light conditions in your venue. In this way, the calibrated sensor will show values between 0 and 100 independent of the light conditions. But using the default EV3 colour calibration available in the colour sensor block could lead to unpredicted problems that are difficult to track and resolved especially when used with multiple Color sensors. So in this series of tutorial we implement the calibration ourselves discussing the principles of colour sensor calibration.

After several questions about the use of the LEGO Mindstorms NXT Light Sensor with the EV3 software, we have decided to go through this problem in this video tutorial and pay special attention to the Raw Sensor Value Block.

Many times we just upload blocks and leave it up to you to use it. In this tutorial, I would like to show you how to use the implemented blocks. How to import them into the EV3-G software. How to see them in the palette. How to drag and drop them to build a working program.

In this video tutorial we accomplish the basketball mission from the FIRST LEGO League 2020 reply competition. We use the LEGO Education SPIKE Prime competition robot called Gazon. You will learn the principles of accomplishing a mission of two parts - put the ball in the basket and lift the basket.

