Complete introduction to the LEGO Mindstorms EV3 Touch sensors from the very first step. In this video tutorial we program the robot to stop on touch sensor pressed. Again, this is based on your feedback that much of our tutorials in previous years were a little more advanced and that we have never made a proper introduction. A few more videos on touch sensor will follow after this
- #138
- 07 Oct 2015
- 10:06
The touch sensor has three states:
- Pressed
- Released
- Bumped
Using the "Pressed" state you can program the robot to wait until the sensor is pressed. The is useful for detecting objects near the robot and acting upon it.

English
In this video tutorial of the series on the EV3 basics we'll introduce you to the touch sensor and how you can use the touch sensor with the brick to position yourself, to detect objects around you and to command, to program even the brick from the sensor. So it'll be brief introduction and then we'll continue with additional tasks that you can implement.
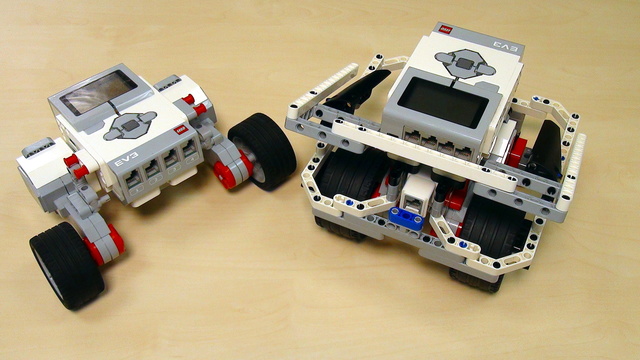
The first important thing is to add the touch sensor somewhere on the robot. Now if we take as a given that this is the front of the robot and this is the back of the robot, we must find a way to add this sensor
at the front of the robot. This is quite straight forward, we have a beam with 2 pins and we add the sensor. And now with this sensor we can bump into objects, we can press and release the sensor. And we should also connect the sensor to the brick. Now this is the first sensor that we are using and as you remember from previous videos we use the ports from A to D to attach motors, so that we can control the motors and we use the ports from 1 to 4 to attach different sensors. And we'll attach the sensor to port 1.
That's all we have to do to attach the sensor to the robot. Now let's look at some of the programs and how we use the sensor. The goal of our program, our first program with the touch sensor, will be to move forward until we press something and when press something, in this case my hand we'll stop. Let's see how we can program this.
This here is the EV3-G software and we'll program the robot. First we need to program the robot to go forward and for this we'll use the Move tank block. And we want to move forward with motor A and motor D, this is where we've connected 2 of the motors, so motor A is currently the right one and D is the left motor. We are moving forward with the power of 50 for 1 rotation. And we want to wait. What are we waiting for? We wait for the touch sensor to be pressed. So we are moving forward until the touch sensor is pressed. From this wait block, located in the orange palate, from the options we select touch sensor. We are waiting, we have to options to compare or to change. Let's start with comparing. We want the sensor to be, let's check them, 0 means released, 1 means pressed and 2 means bumped. Let's start with pressed. We want to move forward until the sensor is pressed, so we stay in this block and wait until the sensor is pressed, and then we want to stop the motors.
Let's stop the motors. OK, let's see how this program works and it won't work as expected. So, what we are expecting is moving forward, pressing the button and then stop. Let's see how this program works. This here is the robot. We have the touch sensor. And now I'll run the program. Run.
The robot moves, we press the touch sensor and it seems that the robot stops. Let's do this again.
I'll move it like this so that you can see it on the camera.
OК it seems that the robot stop when you press the touch sensor. But actually if we start the program without putting my hand here as an end we start the program and we can see that the robot stops even if we don't press the sensor. More importantly if my hand is even closer we expect that the robot would stop now. Let's start it.
But as you can see the robot does not stop right in the moment when it reaches my hand, when we press the touch sensor. So, the program is not working as expected. Again.
Let's go back to the software and see what's the problem. The issue with this program is that we are moving the motors not until we reach my hand where it can press the touch sensor. The problem is that we are moving the motors for only one rotation. So we are saying to the program OK, move for one rotation and then wait and then stop. What happens if the wall or my hand is on 3, 4, 5, 10 rotations as a distance with this program the robot will never reach my hand, so we are programming it for only one rotation. How can we know how far is the object before we download the program. What can we add here, should we add 1, 2, 3, how many rotations. Where is the object? How do we program this before we know where the object is, before we start the robot? The answer is pretty simple. It's very easy to implement this in the software. We just start the motors, without setting the number of rotations. We just set the motors to On - that means just turn the motors on. Doesn't matter how long they will travel, just turn them on. And we turn the motors on with power 50 and this block will execute, and then we'll wait until we press the touch sensor. This is kind of difficult for some of the students to get their head around this but that's very powerful to be able to set the motors just to move forward without setting the number of rotations, because you don't know them in advance.
The robot only finds how many rotations it makes, when it is actually working, when it is moving to the object. So we are programming the motors, then we are waiting for a touch sensor and then we stop. Let's see if this program works.
Now, if I download the program and I place my hand right here.
The robot moves to my hand and we press the touch sensor and the robots stops. What happens if my hand is at another location.
Now we'll move.
As you can see the distance is different, we start the program the robot moves.
I couldn't press the touch sensor. Again.
The moment I press the touch sensor, the robot stops. Or it could be just a from a centimeter. I'll start the program.
And the robot stops. So this is a basic introduction to the touch sensor and how it works. In the next video we'll explore, the other options of the touch sensor and some more interesting programs.
Курсове и занятия включващи този Урок
Този Урок е използван в следните курсове и занятия.
EV3 Basic Course. Introduction to robot programming, construction and sensor use
This course is designed for students, mentors and teachers that are completely new to LEGO Mindstorms EV3 robots and would like to start using them to learn, in classes or at competitions. It is quite different from previously built resources at FLLCasts because it makes no assumption on any previous knowledge and tries to introduce everything step-by-step.
- 38
- 193:26
- 30

Touch Sensor
Complete introduction to the LEGO Mindstorms EV3 Touch sensors from the very first step. In this video tutorial we program the robot to stop on touch sensor pressed. Again, this is based on your feedback that much of our tutorials in previous years were a little more advanced and that we have never made a proper introduction. A few more videos on touch sensor will follow after this
- 4
- 0
- 4
- 3d_rotation 0

Instructors Remote Training
If you are working with students and you want to introduce Robotics to your class or you want to mentor a FLL team, but you are insecure about your technical knowledge in the Robotics field, then this is the right place for you. Having in mind teachers' busy schedule, we have design two different schedules and added an option to design one just for you. FLLCasts's Mindstorms EV3 Robotics Online Training is the perfect match for any teacher.
After the completion of each task the participant has to upload his solution for verification.
- 183
- 280:11
- 156

Touch Sensor Theory and Practice
Complete introduction to the LEGO Mindstorms EV3 Touch sensors from the very first step. In this video tutorial we program the robot to stop on touch sensor pressed. Again, this is based on your feedback that much of our tutorials in previous years were a little more advanced and that we have never made a proper introduction. A few more videos on touch sensor will follow after this
- 3
- 0
- 0
- 3d_rotation 0
Instructors Remote Training
If you are working with students and you want to introduce Robotics to your class or you want to mentor a FLL team, but you are insecure about your technical knowledge in the Robotics field, then this is the right place for you. Having in mind teachers' busy schedule, we have design two different schedules and added an option to design one just for you. FLLCasts's Mindstorms EV3 Robotics Online Training is the perfect match for any teacher.
After the completion of each task the participant has to upload his solution for verification.
- 183
- 280:11
- 156