

Gapped & Crossed Line Following. Part 6. Move after the Gap
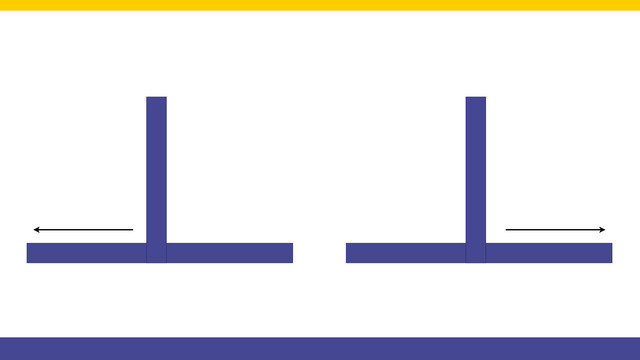
We've detected the gap. It's time to move over it. This is difficult because we have to detect where the line is after the 0.1 meters gap on the line following field.
- #209
- 17 Feb 2016
We've detected the gap. It's time to move over it. This is difficult because we have to detect where the line is after the 0.1 meters gap on the line following field.

Next important state is Turn Right with our robot. This happens when we detect a line on the right.

This second part continues with importing two previously developed in Episode 53 blocks into our program. With them we can for align to lines. We program the robot to align to the cross line and start following it.

Next state in our state machine programming pattern is the "Turn Left" state and the corresponding behaviour.

We can Turn Right. We can Turn Left. How do we decide which way to go if there are lines both to the left and to the right. Check out the video.
All worked as expected, up until know because the robot got lost. This happens when we turn right and the line does not continue to the right. Now the robot must somehow understand that it is "lost" and escape.

We discuss the state of "Lost" and the different ways we could escape this state. We also build the next step of our State machine programming pattern where the next state is determined by the previous state.

In this tutorial, we would implement a program that finds the minimum and maximum value detected by the sensor and stores this two values in an array.

The final video from the course. The robot escapes the state where it is lost. This happens if it can not continue in any direction.

Many times we just upload blocks and leave it up to you to use it. In this tutorial, I would like to show you how to use the implemented blocks. How to import them into the EV3-G software. How to see them in the palette. How to drag and drop them to build a working program.

"Array initialization" is the first step in every program that involves Arrays. This applies to most programming languages and for EV3-G it is a must.
In this tutorial, we would show you how to initialize the array and how to extract this logic in a new block

In the course section for Advance Sensor Calibration we previously showed you how to find the minimum and maximum value for a single LEGO Mindstorms Color Sensor and to store this value in an array. The program was implemented with the EV3-G software. In this tutorial we are going to find the Min and Max for all the four sensors and to store all the 8 values in an array.

Implement a program for stopping at a black line with the blocks containing the implementation details for the InitArray, Calibration and Getting the calibrated result.

Following the Advance Light/Color sensors calibration for a minimum value for a single sensor tutorial, in this one, we continue with finding the maximum value detected by a sensor and storing this value in an array.

As an exercise try to implement the calibration of the minimum and maximum values for a single sensor.

Implement the program for array initialization.
Follow the video tutorials for initializing arrays and implement the program.

Following the previous tutorials from the course, implement the calibration of the minimum and maximum values.

One of the smartest things you could do in any software program is to extract logic in small reusable, simple, understandable units. In EV3-G these are called Blocks and we are going to extract the logic for finding a minimum and maximum for each of the sensors in a new block.

A common question is how to display arrays on the LEGO Mindstorms EV3 brick screen. Displaying values from an array is not different from any other display operation. In this tutorial, we would look at displaying two specific values. The minimum and the maximum for a specific sensor from the Advance Calibration Course Section

Following the Advanced Sensor Calibration course section, it is time to extract the logic for getting a calibrated value into a new block. This block will have an input and on this input, we give the port number. The block will return the calibrated value for this port number. We've built all the other blocks only because of this almost final video here.

In this tutorial, we show you how to display all the values from an EV3-G array on the EV3 brick display. We are using an array Read Operation along with a loop. We are also detecting the loop counter and using it as an index to an array. It's basically the only viable way to do it. The process is commonly referred to as - "Iteration over an array" (although we still do not have an iterator in the programming language, we promise that one day we would do the super advance videos on "iteration" using the LEGO MINDSTORMS robots")

In this LEGO robotics video tutorial we will accomplish mission 8 from the FIRST LEGO League 2020 RePlay competition. The name of the mission is Boccia. What you will learn from the video is how to accomplish complex missions that require following a line, aligning to the line and accomplishing many mission models in a single run

This animation demonstrates the principle of aligning to a line with two color sensors and a LEGO Mindstorms Robot Inventor robot. This is a useful concept for FIRST LEGO League competitions where you want to know exactly where you are on the field and to achieve consistent behavior. In the course lesson you will also find a live video tutorial where we enter into more details about aligning. We align the robot to a line by moving both sensors slowly until they both see a black line. When one of them sees the line we move only the other. At the end we return the first sensor back.

Following the Advance Sensor Calibration course section, we found the min and max values detected by each sensor. Now it is time for the real deal of the calibration. Detect the current value from the sensor and find what is the percentage of this value for the range between min and max.

This LEGO robotics video tutorial is a 10 out of 10 run of the one of the most complex missions at the FIRST LEGO League 2021 RePlay competition. As the mission has three parts we are measuring the success rate of each part of the mission. What you can learn from this tutorial is how to achieve three missions in a single run including line following and a lot of aligning

10 out of 10 video tutorial for Rowing Machine mission from the FIRST LEGO League 2021 RePlay robotics competition. In the tutorial you will see how to accomplish the mission almost every time. This is a mission that requires a lot of precision so naturally it is difficult to accomplish it every time, but with the right attachment for the LEGO Education SPIKE Prime robot it is achievable

In this video tutorial we discuss probably the most useful principle that we've found for FIRST LEGO League competitions and this is how to align to a line with two color sensors. We use the LEGO Mindstorms Robot Inventor for a quick demonstration of the principle. In the LEGO Mindstorms Robot Inventor Programming course we enter into more details of how exactly we program the sensors. The current tutorial demonstrates the use of such a program and makes clear why this could be very useful and is a must for any well prepared team and wants to achieve a good score on the competition.