This is the first video tutorial from the LEGO Education SPIKE Prime programming course in which we use a sensor, and we've selected to use the motion sensor. The Motion sensor allows us to detect how the robot turns in a 3-dimensional space-time continuum, or, to put it simply, we use it to move straight with the robot. That's it. We want to move straight - we use a sensor, and the Motion Sensor is a good choice.
- #1914
- 19 Jul 2022
- 5:03
- LEGO Education SPIKE Prime
- Move straight, Scratch, LEGO Education SPIKE App Word Blocks 2, Programming, Sensors, Motion Sensor, Gyro Sensor
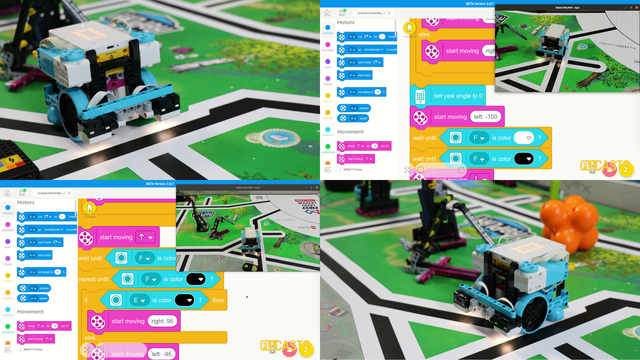
The program for the motion sensor is quick and basic, and it is a familiar duck-type walking program where the robot moves left, right, left, right, and so on. The program gets the job done - in the end, the robot moves in a straight line.
In the tutorial, we demonstrate the behavior of the robot, and we go into details in the Scratch (Word Blocks) program explaining every block.
How to use this tutorial?
Download the program and experiment with the robot. Change the angles of turning. Change the duration of the repeat block and the values of the yaw angle. See how the robot behaves.
English
In this video tutorial, we use a LEGO Education SPIKE Prime, and we use the motion sensor of this robot to try to move forward and to keep a straight line. In this tutorial, we demonstrate something like a duck type walking, turning left and right, that keeps the general direction, misses some of the details, but it's an easy program that you can start with and you can explore of how do we achieve a straight line walk with the robot. These robots are not very reliable when it comes to moving forward and even though they have a number of advanced algorithms that are embedded in the brick, it is difficult to keep the robot moving in a straight line. It always goes slightly to the left or slice to the right. The only practical way in which we can get the robot to move forward is to use sensors and the motion sensor is embedded in the brick and we'll move to a number of programs for the motion sensor. This one is a pretty simple program where we just move slightly to the left, slightly to the right, and we'll enter into more details about the program in this tutorial. The goal here is just to make it clear that it's the first program and there are a lot more advanced programs. What you can see here is that even as I touch the robot and I try to rotate it, it tries to keep a straight line and it tries to continue moving forward, which is the power of the sensors.
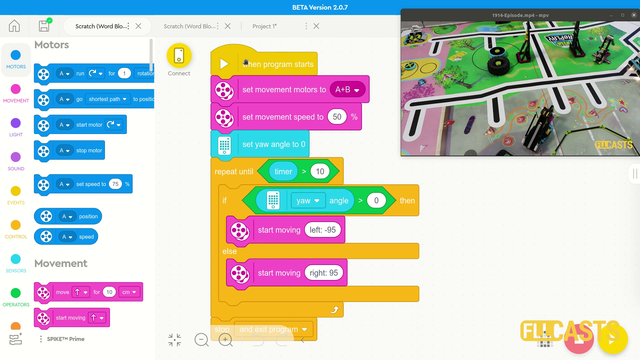
Now let's go a little bit more into the programming. Okay, great. I'm rather excited about it because this is the first time in this course that we get to demonstrate some of the sensors. And the sensors that we are working with is the motion sensor. This is how our scratch program looks like when the program starts. Initially, we set the movement motors to A and B and the speed to 50%. General good practice. Not very fast, not very slow. Then what we do is set the yaw angle to zero, and the motion sensor has three angles. The yaw angle is the one that measures how the robot has turned to the left and to the right. And what we do after that is we try to move forward with the robot and keep a straight line like this, move forward and try to keep a straight line. But you can see that the robot is slightly to the left side, to the right, left, right, left, right. The way the program works is we repeat. We repeat for about 10 seconds. And this here is the repeat loop. We repeat for 10 seconds, and we constantly check if the angle is more than zero, then start moving left. The left side we want to move to the left, else we want to move to the right. And that's it. Simple program. So if the robot is going to the right and is making a mistake there, so the robot is not keeping a straight light straight line. We turn it to the other side, and it's a general, simple algorithm that could be used for the motion sensor or for the light sensors, and you see how it behaves. Now, we can, of course, experiment with these values here for moving. And what I would like you to do is to now download this program and see what happens if you change this value to 90, not 95. Would this be smoother or more of a sharp turn? That's an Interesting Question. And you should download the program and experiment with the robot. Again, we Move Forward. Let's See It.
And we repeat for about 10 seconds. If the angle is more than zero we start moving left with -95 else we move right with 95 download the program and experiment.
See you in the next tutorial.
Courses and lessons with this Tutorial
This Tutorial is used in the following courses and lessons
LEGO Education SPIKE Prime Programming for Competitions with Word Blocks
Two fundamental concepts are essential for robotics competitions: ensuring the robot consistently navigates and positions itself accurately on the field and designing attachments that complete missions once the robot reaches its target. This course focuses on the first aspect - precise navigation and positioning - while the second is covered across the entire FLLCasts platform, starting with the FIRST LEGO League with LEGO Education SPIKE Prime. "Challenge" competition for 9-16 years old
The goal of this course is to help you learn how to program LEGO Education SPIKE Prime robots to operate consistently and reliably in competition settings. We use LEGO Education SPIKE App Word Blocks, a Scratch-based programming language, to teach key techniques applicable to FIRST LEGO League and World Robot Olympiad competitions. Topics covered include different methods for line following, such as fast, slow, smooth, and using multiple states, as well as techniques for line alignment, double alignment, and maintaining a straight path using the motion sensor.
- 40
- 188:21
- 19
Motion sensor - move forward
This is the first video tutorial from the LEGO Education SPIKE Prime programming course in which we use a sensor, and we've selected to use the motion sensor. The Motion sensor allows us to detect how the robot turns in a 3-dimensional space-time continuum, or, to put it simply, we use it to move straight with the robot. That's it. We want to move straight - we use a sensor, and the Motion Sensor is a good choice.
- 1
- 0
- 1
- 3d_rotation 1