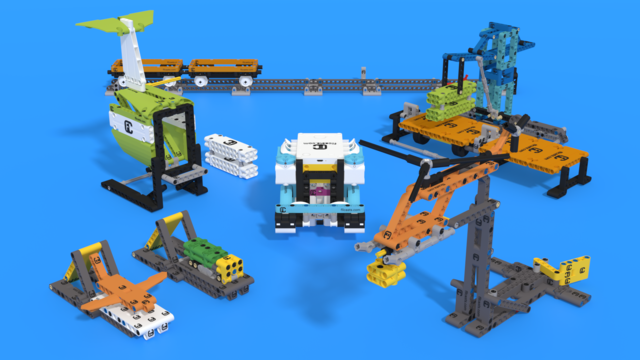
In this video tutorial, we use the Unload Cargo Ship mission from FIRST LEGO League 2021 Cargo Connect robotics competition to demonstrate how we program the robot to keep a straight line while moving. Do we need that for this mission? Probably not, but we do it either way to demonstrate the solution in a fairly simple mission. The program uses the motion sensor to auto-correct the errors the robot is making while moving.
- #2072
- 24 Jan 2023
- 15:11
- LEGO Education SPIKE Prime
- Push, Auto-correct, Move straight, FIRST LEGO League, FIRST LEGO League 2021-2022 Cargo Connect, Scratch, LEGO Education SPIKE App Word Blocks 2, Motion Sensor, Gyro Sensor, Sensors
English
WEBVTT 1 00:00:01.280 --> 00:00:02.860 In this video tutorial, 2 00:00:02.890 --> 00:00:10.740 we accomplish a push poll mission where we must push or pull on the mission, though, 3 00:00:10.770 --> 00:00:18.520 and we use the FIRST LEGO League cargo connect unload cargo mission as a demonstration. 4 00:00:18.840 --> 00:00:21.380 We use a LEGO Education SPIKE Prime robot 5 00:00:21.400 --> 00:00:25.980 to accomplish the mission with an interesting attachment. 6 00:00:26.010 --> 00:00:29.260 Let's see how we accomplish the mission. 7 00:00:29.290 --> 00:00:36.140 This here is the robot and it's from move forward and we push on the mission model. 8 00:00:36.170 --> 00:00:42.460 Now, this mission seems quite simple and it might be, 9 00:00:42.490 --> 00:00:46.420 but don't forget that this mission is on the other end of the field. 10 00:00:46.450 --> 00:00:51.860 So getting here and pushing it forward is a difficult part. 11 00:00:51.890 --> 00:00:55.860 Now, when you want to get to this part of 12 00:00:55.890 --> 00:01:02.260 the field, we can align first to this black line, then we can turn back 13 00:01:02.290 --> 00:01:07.920 and align to this black line in order to compensate for the error that the robot 14 00:01:07.950 --> 00:01:12.460 is making, then move back into align to this black line. 15 00:01:12.490 --> 00:01:16.540 And in this way we autcorrect, we 16 00:01:16.570 --> 00:01:20.700 compensate for the errors that the robot is making. 17 00:01:20.730 --> 00:01:23.420 On its way from the base to this side 18 00:01:23.450 --> 00:01:27.100 of the field, the robot will make some errors. 19 00:01:27.130 --> 00:01:31.660 As you can see, we have a rather large attachment at the front. 20 00:01:31.690 --> 00:01:35.140 So you should think about a good strategy 21 00:01:35.170 --> 00:01:38.180 when turning when the robot has large attachments. 22 00:01:38.210 --> 00:01:42.290 And for this specific mission, it's better to move backward 23 00:01:42.320 --> 00:01:49.490 with the robot. At the end, we reach this line and for this recording 24 00:01:49.520 --> 00:01:55.180 we start from this line because we want to also discuss how do we move forward. 25 00:01:55.210 --> 00:01:58.380 And we keep a straight line with the motion sensor. 26 00:01:58.410 --> 00:02:01.740 And we see this when we discuss the program. 27 00:02:01.770 --> 00:02:06.380 And our goal is to show you the algorithm of how do we move forward. 28 00:02:06.410 --> 00:02:11.020 Now, do we need to use this algorithm for this specific mission? 29 00:02:11.050 --> 00:02:14.340 Probably not. We can just move forward with the robot 30 00:02:14.370 --> 00:02:18.340 when we reach the line, but we take the opportunity. 31 00:02:18.370 --> 00:02:22.220 So again, we align to different lines. 32 00:02:22.250 --> 00:02:26.020 We reach one of these lines and then we 33 00:02:26.050 --> 00:02:28.660 move forward and we accomplish the mission. 34 00:02:28.690 --> 00:02:31.730 And when moving forward, we use the motion sensor. 35 00:02:31.760 --> 00:02:34.500 And an interesting algorithm for keeping 36 00:02:34.530 --> 00:02:40.520 a straight line. Right here when we move, we want to keep a straight line. 37 00:02:41.880 --> 00:02:46.960 Let's see the programming and discuss the algorithm. 38 00:02:47.520 --> 00:02:50.380 This here is the program for our robot. 39 00:02:50.410 --> 00:02:53.820 Again, we don't need to implement the program in this way. 40 00:02:53.850 --> 00:03:00.340 For this particular mission, we can always just move forward with the motors. 41 00:03:00.370 --> 00:03:04.380 But what we've learned, and I hope you've learned with this course 42 00:03:04.410 --> 00:03:09.100 and with the demonstration with all the other courses, is that we cannot rely 43 00:03:09.130 --> 00:03:16.020 on the robots on the motors to move the robot in a straight line. 44 00:03:16.040 --> 00:03:16.540 Why? 45 00:03:16.570 --> 00:03:20.340 Because they will slip on the field, they will make some mistakes. 46 00:03:20.370 --> 00:03:23.900 There will always be some errors, errors that are occurring. 47 00:03:23.930 --> 00:03:28.420 So what we must do is try to use different algorithms. 48 00:03:28.450 --> 00:03:30.580 And in our case, we'll use an algorithm 49 00:03:30.610 --> 00:03:35.500 for keeping the robot moving straight in a straight line. 50 00:03:35.530 --> 00:03:39.700 And this here is our LEGO Education SPIKE Prime robot program. 51 00:03:39.730 --> 00:03:46.220 Here is when the program starts, we set movement speed to 50%. 52 00:03:46.250 --> 00:03:52.420 And what we can see is that there are two variables right here. 53 00:03:52.450 --> 00:03:56.340 If I open this window, I can see that there are two variables. 54 00:03:56.370 --> 00:04:03.220 One of the variables says movement speed, which is 50, and the other is ten yaw. 55 00:04:03.250 --> 00:04:04.580 But we'll get to there. 56 00:04:04.610 --> 00:04:08.500 So, movement speed, this is the speed with which we want to move the road. 57 00:04:08.530 --> 00:04:13.940 And we set movement motors to A and B, and we set the movement speed 58 00:04:13.970 --> 00:04:20.980 for the two motors to the value of the variable movement speed. 59 00:04:21.010 --> 00:04:25.380 And the reason why we do this is because further down in the program, 60 00:04:25.410 --> 00:04:29.700 we might want to change the value of this movement speed. 61 00:04:29.720 --> 00:04:34.620 And it's easier as a configuration to have all the variables on the right, 62 00:04:34.650 --> 00:04:39.460 and when you want to change something, to just change it at one place. 63 00:04:39.480 --> 00:04:42.180 Otherwise it gets a little tricky. 64 00:04:42.210 --> 00:04:44.500 Because if we want to change the speed 65 00:04:44.530 --> 00:04:50.260 of the robot, we must go to this set movement speed. 66 00:04:50.280 --> 00:04:54.740 And we then have to go to 67 00:04:54.770 --> 00:05:01.780 probably there is some other movement speed block down the program. 68 00:05:01.800 --> 00:05:07.860 And if we want to change the speed of the robot, we have to change on two places. 69 00:05:07.890 --> 00:05:12.380 When we have the variable on the right, we change on a single place. 70 00:05:12.410 --> 00:05:14.460 But that's not the main point here. 71 00:05:14.480 --> 00:05:18.780 The main point is how do we make the robot move forward? 72 00:05:18.800 --> 00:05:20.460 Here it is. 73 00:05:20.480 --> 00:05:22.940 Set movement motors to A and B. 74 00:05:22.970 --> 00:05:25.740 Set movement speed to movement speed. 75 00:05:25.770 --> 00:05:29.780 Then we reset the motion sensor. 76 00:05:29.800 --> 00:05:31.940 We set yaw angle to zero. 77 00:05:31.970 --> 00:05:34.220 This is our starting position. 78 00:05:34.250 --> 00:05:39.780 And we detect the rotation with Motor A, 79 00:05:39.800 --> 00:05:46.180 and we wait until Motor A has reached a relative position of -520. 80 00:05:46.200 --> 00:05:48.820 Degrees. So motor A is moving forward. 81 00:05:48.850 --> 00:05:53.060 And this is how we know that we moved forward long enough. 82 00:05:53.090 --> 00:05:55.260 Now, should we use a sensor here? 83 00:05:55.290 --> 00:05:58.500 Yes, we should definitely use the sensor 84 00:05:58.530 --> 00:06:04.500 and not a fixed repeat until with a value 85 00:06:04.530 --> 00:06:11.100 for the rotation. We should use this black line here to understand whether to stop. 86 00:06:11.130 --> 00:06:14.180 But this would have made the program way too complex. 87 00:06:14.210 --> 00:06:19.460 And in some of the previous programs we've demonstrated how you can stop there. 88 00:06:19.480 --> 00:06:25.020 So don't use hard coded values for angles. 89 00:06:25.040 --> 00:06:30.980 The moment you use hard coded values for angles and for rotations like this, 90 00:06:31.010 --> 00:06:36.340 you get a robot that's not consistent and it's not reliable. 91 00:06:36.360 --> 00:06:39.620 If you see such a value, always try to remove it. 92 00:06:39.640 --> 00:06:41.020 How are we going to remove it? 93 00:06:41.040 --> 00:06:47.420 In our case, we can always move forward until we reach this black line here. 94 00:06:47.450 --> 00:06:50.980 So just move forward until we reach this black line. 95 00:06:51.010 --> 00:06:55.780 In our case, for the recording, we hard coded it to make the program 96 00:06:55.800 --> 00:07:01.420 simpler and to be able to explain it in like two to three minutes. 97 00:07:01.450 --> 00:07:04.940 Then what we are doing is while we are 98 00:07:04.970 --> 00:07:10.140 waiting for the robot to move forward, we are repeating two actions. 99 00:07:10.170 --> 00:07:16.500 First, we set the angle. 100 00:07:16.530 --> 00:07:19.700 We take the Yaw angle from the motion 101 00:07:19.730 --> 00:07:24.020 sensor and we set it to this variable tempYaw. 102 00:07:24.040 --> 00:07:31.580 So if the robot moves slightly to the right, tempYaw will be positive integer. 103 00:07:31.600 --> 00:07:36.180 If it moves slightly to the left, tempYaw would be a negative integer. 104 00:07:36.210 --> 00:07:38.340 And that's the important part here. 105 00:07:38.360 --> 00:07:40.980 Move right, it will be positive. 106 00:07:41.010 --> 00:07:44.140 Move left, it will be negative. 107 00:07:44.170 --> 00:07:50.900 And as we take this value from the Yo angle, this here is the interesting block. 108 00:07:50.920 --> 00:07:55.020 This is the block that's helping us keep a straight line. 109 00:07:55.040 --> 00:07:57.580 What we do with this block we have right 110 00:07:57.600 --> 00:08:03.780 here in the pallet on the left, we have more movement motor or blocks. 111 00:08:03.800 --> 00:08:07.540 And in these more movement blocks, we have this. 112 00:08:07.570 --> 00:08:16.900 Start moving at 50 50% of power, which practically means set this 113 00:08:16.920 --> 00:08:21.780 value to one of the motors and set this value to the other motor. 114 00:08:21.800 --> 00:08:26.020 And this will be our A motor and this will be our B motor. 115 00:08:26.040 --> 00:08:29.180 So what do we want to happen with the robot? 116 00:08:29.210 --> 00:08:32.980 If the robot goes slightly to the right, 117 00:08:33.010 --> 00:08:39.500 what we want to do is for the right motor to move faster than the left motor. 118 00:08:39.530 --> 00:08:44.420 So if the robot goes up, it makes a mistake and it goes up. 119 00:08:44.440 --> 00:08:46.580 We want to compensate for this mistake 120 00:08:46.610 --> 00:08:52.140 by moving faster with the right motor and slower with the left motor. 121 00:08:52.170 --> 00:08:54.980 And this is how we want to compensate for the error. 122 00:08:55.010 --> 00:08:58.820 And this is what this block here is doing. 123 00:08:58.850 --> 00:09:06.980 If we set moving at two different values, values for A and values for B. 124 00:09:07.010 --> 00:09:14.660 So if the Yaw angle is positive, which means the robot has turned slightly 125 00:09:14.690 --> 00:09:20.660 to the right, we want the left motor to be slower. 126 00:09:20.690 --> 00:09:27.820 So we set movement speed, which is 50 minus, let's say five, because 127 00:09:27.850 --> 00:09:32.220 this is the angle that the robot has turned. 128 00:09:32.250 --> 00:09:35.420 And this gives us 45. 129 00:09:35.440 --> 00:09:38.140 And for the other motor, for the B motor, 130 00:09:38.170 --> 00:09:41.820 which is on the right of our robot, 131 00:09:41.850 --> 00:09:48.380 we set the speed to 55 50 plus five. 132 00:09:48.410 --> 00:09:52.980 So in this way, we start moving at 45 55, 133 00:09:53.010 --> 00:09:59.620 which makes the left motor turns slower than the right motor. 134 00:09:59.650 --> 00:10:02.900 And in this way, we compensate for that error. 135 00:10:02.930 --> 00:10:06.820 Now, if there is no error, if the robot is moving perfectly straight, 136 00:10:06.850 --> 00:10:13.500 and yaw angle says that we are at zero degrees, what we are doing then is we are 137 00:10:13.530 --> 00:10:22.220 moving at 50 minus zero, which is 50, and 50 plus zero, which is 50. 138 00:10:22.250 --> 00:10:29.020 And this way we make the robot keep a straight line. 139 00:10:29.050 --> 00:10:31.820 And if we want to change the speed of the robot, 140 00:10:31.850 --> 00:10:37.420 we can change only at a single place, right here, at the variables. 141 00:10:37.440 --> 00:10:40.940 We don't have to change it in three different places. 142 00:10:40.970 --> 00:10:47.380 We don't have to change it here and here and here, we change it at a single place. 143 00:10:47.410 --> 00:10:51.060 So it's easy for us to configure the behavior of the robot. 144 00:10:51.080 --> 00:10:58.820 These are the principles - extract such constants into variables that we can 145 00:10:58.850 --> 00:11:03.580 configure at a single place that's for the variables and 146 00:11:03.610 --> 00:11:10.780 for moving straight, we try to compensate for the error that the robot is making. 147 00:11:10.810 --> 00:11:13.040 Now, if we move forward here is 148 00:11:13.070 --> 00:11:21.140 the program move forward and show how the robot it went slightly 149 00:11:21.170 --> 00:11:28.500 to the left, slightly to the left, and here it is to the right. 150 00:11:28.530 --> 00:11:30.820 Sorry. When the robot starts, 151 00:11:30.850 --> 00:11:35.940 it goes slightly to the right, and then we start compensating. 152 00:11:35.970 --> 00:11:39.140 We see AHA, the robot is to the right, 153 00:11:39.170 --> 00:11:42.580 probably around three, four, five degrees to the right. 154 00:11:42.610 --> 00:11:50.500 So we start compensating and the robot turns and it's now moving straight. 155 00:11:50.530 --> 00:11:56.380 It corrected the error, which is perfect. 156 00:11:56.410 --> 00:11:58.740 This is exactly what we need if the robot 157 00:11:58.770 --> 00:12:04.820 makes a mistake, always correct for the Error, and then we start moving back. 158 00:12:04.850 --> 00:12:08.920 When moving back, we want to do the same thing. 159 00:12:10.040 --> 00:12:11.860 We set the angle to zero, 160 00:12:11.890 --> 00:12:15.860 we set the relative position of eight to zero and we move back again. 161 00:12:15.890 --> 00:12:21.060 Don't hardcode such values always try to detect something with the light sensors. 162 00:12:21.080 --> 00:12:22.900 We do it here to make the robot, 163 00:12:22.930 --> 00:12:29.340 the program simpler, and to focus on one specific thing, which is moving straight. 164 00:12:29.370 --> 00:12:36.940 When we are moving straight, the opposite should happen we move with 165 00:12:36.970 --> 00:12:41.100 motors A and B, but we move back and that's why we 166 00:12:41.130 --> 00:12:46.900 multiply this movement speed by -50 minus one. 167 00:12:46.930 --> 00:12:51.300 So if it was 50, it is now -50 168 00:12:51.330 --> 00:12:58.900 if it was 50 it is now -50 and if the robot is slightly to the right. 169 00:12:58.930 --> 00:13:02.620 This means that tempYaw will be A positive integer. 170 00:13:02.650 --> 00:13:06.540 Let's say five and we'll start moving 171 00:13:06.570 --> 00:13:14.780 with -50 minus five which is -55 and when we are moving back. 172 00:13:14.810 --> 00:13:21.540 If the robot is slightly to the right, we set the speed of the left motor to be 173 00:13:21.570 --> 00:13:27.180 -55 and the speed of the right motor to be 174 00:13:27.210 --> 00:13:33.340 -45 and in this way the left motor moves 175 00:13:33.370 --> 00:13:39.060 faster than the right, and the robot compensates for the Error. 176 00:13:39.080 --> 00:13:42.040 Let's see it in action. 177 00:13:42.840 --> 00:13:51.220 You see how the robot when it starts, it is slightly to the right, right here. 178 00:13:51.250 --> 00:13:54.860 And now we move back and it compensates. 179 00:13:54.890 --> 00:14:03.260 And it is again at an exact angle. 180 00:14:03.290 --> 00:14:11.300 It makes the Error when it starts right here it is slightly to the right. 181 00:14:11.330 --> 00:14:12.700 We compensate. 182 00:14:12.730 --> 00:14:15.820 Now it makes a second Mistake, second Error. 183 00:14:15.850 --> 00:14:17.460 It is slightly to the right. 184 00:14:17.490 --> 00:14:22.120 You see it right here, how it is slightly to the right. 185 00:14:25.480 --> 00:14:32.900 And we compensate and we turn it to the left. 186 00:14:32.930 --> 00:14:34.860 Because of this algorithm, 187 00:14:34.890 --> 00:14:39.700 and this is how we use the motion sensor to keep a straight line. 188 00:14:39.730 --> 00:14:41.620 This is how we use the motion Sensor 189 00:14:41.650 --> 00:14:45.140 to auto correct and to compensate for the Error. 190 00:14:45.170 --> 00:14:53.860 I know I've been repeating this more than enough, but it's important. 191 00:14:53.880 --> 00:14:54.540 It's important. 192 00:14:54.570 --> 00:15:00.580 It's a very simple way in which we can use the motion sensor to keep a straight Line. 193 00:15:00.610 --> 00:15:06.380 I hope this is helpful, and I hope that you can use it in your programs. 194 00:15:06.400 --> 00:15:07.960 And I'll see you in the next tutorial.
Courses and lessons with this Tutorial
This Tutorial is used in the following courses and lessons
FIRST LEGO League 2021-2022 Cargo Connect solutions and review with LEGO Education SPIKE Prime
In this course, we demonstrate and explain example solutions for the FIRST LEGO League 2021-2022 Cargo Connect competition. Just like every year, we share solutions only after the season is over. In this course, you will find examples and principles of building attachments and will learn how to program consistent and reliable robots for each mission. You can follow the course, and as you go through each mission, try to replicate the solutions to understand the programs and explanations. Upon completion of the course, you will have many new ideas about how to approach the missions in every FLL robotics competition and how to help your team score more points.
Before starting this course, we suggest you go through the FIRST LEGO League robot game guide
- 55
- 181:18
- 34

M07. Unload Cargo Ship
In this video tutorial, we use the Unload Cargo Ship mission from FIRST LEGO League 2021 Cargo Connect robotics competition to demonstrate how we program the robot to keep a straight line while moving. Do we need that for this mission? Probably not, but we do it either way to demonstrate the solution in a fairly simple mission. The program uses the motion sensor to auto-correct the errors the robot is making while moving.
- 3
- 1
- 2
- 3d_rotation 6