
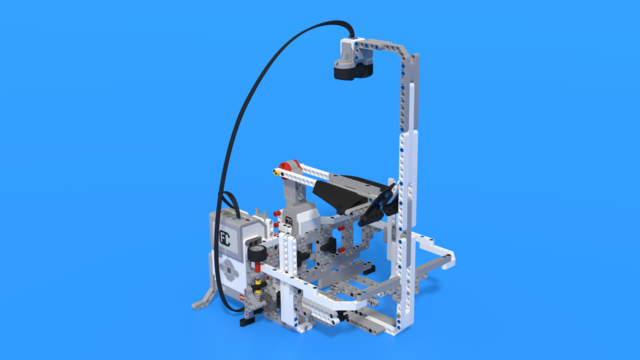
Frankenstein LEGO Robot with motors in opposite directions
Building instructions for the robot build with LEGO Mindstorms EV3. It is called "Frankenstein" because the two motors are in two different directions.
- #77
- 28 Feb 2016
- 1
Building instructions for the robot build with LEGO Mindstorms EV3. It is called "Frankenstein" because the two motors are in two different directions.

For World Robotics Olympiad Ball Collection competitions we prepared an interesting Robot Base Chassis that could be extended with a container. The container contains the ping-pong ball. A mechanism collects them. This LEGO Mindstorms EV3 building instructions are for the chassis of the robot and were one of the versions from a series of robots.

The building guide for the FIRST Technical Challenge Push Bot build with the Tetrix set

In this spreadsheet, we have the values for the Integral part and the Gyro sensor for moving straight with the robot.

The data log from the experiment when moving forward and keeping straight with an implementation for Proportional compensation.

This is a disk image containing a Raspbian OS. The image is modified and set up specifically for the Perfect course. It contains all the needed files, libraries and additional tools that we would use in the course. The file is quite large so be prepared to wait some time while downloading.
Checksum: 4d85292f49a9350fcef9f2eb8fd86b77f1c6bd65ce1344848de3e201c9e1d20d

Building instructions for constructing a simple LEGO Model that has red, green, blue and yellow beams. This makes it perfect for operating robots through color code.

This is a vehicle that is used to help you to learn programming, to experiment with addons, attachments and constructions. It has a frame. Which is nice. A frame is always nice.
It has two wheels at the back, but this is needed only if you have them.
The Laboratory is a robot that tests your programming skills. You will have to measure the volume of a balloon, only by the values you receive from the sensors.
It has a valve, that allows you to deflate your balloon at different rates.
How to place the balloon in the robot is explained in this tutorial.

Laboratory 2.0 is a second and lighter version of the Laboratory. The new version of the robot replaces its motor with a gyroscope and uses a lightweight flip. Programming this robot requires a well-developed abstract thinking. The main purpose of the robot is to measure the volume of the bubble placed in it only by the values measured by the sensors.
The construction has a valve with which you can let the air out of the balloon at different speeds.
How exactly the balloon is placed in the robot is explained in this lesson.

This module is meant to be used in EV3 Kinesthetic and Memory Game and is attached to the base of the robot. This is the simplest module for constructing and programming. At the bottom, a channel is left for the cable to pass through.

This robot looks a bit weird. Can you guess why? The motors are placed in opposite directions. One of the motors is facing "forward" while the other one is facing "backwards". This means that if you tell both motors to rotate forward the robot will just rotate! To make the robot move forward, you will need to make one of the motors rotate forward and the other one - backwards.
The goal of this robot is to teach students that motors could be placed in many different ways. It is not always the case that the two motors face the same direction and this needs to be accounted for during programming.

