

Improving FLL Robot Game. Driving the scissors mechanism. Change gear orientation
In this tutorial, we would drive the scissors mechanism and there are a number of rules that we must follow
- #454
- 22 Mar 2017
In this tutorial, we would drive the scissors mechanism and there are a number of rules that we must follow

Experiment with changing the orientation and direction of gear wheels. Here are part of the tasks that you should complete before moving forward with the course.

It this episode we would present you with our attachment for lifting the robot.
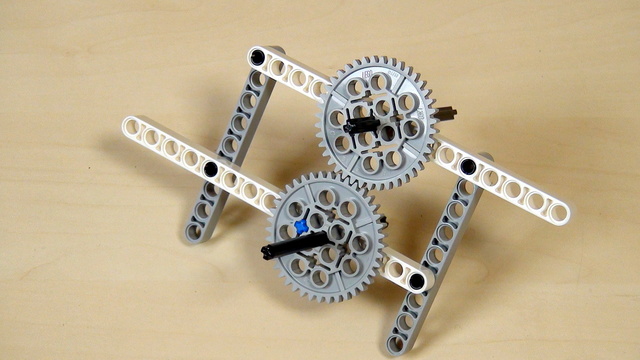
One of the very common problems with the LEGO Mindstorms and LEGO Technic Gear wheels is then a tooth is skipped. In this video, I would like us to discuss this challenge and how do we solve it.

Here is the task for adding a beam on both sides of every gear wheel in your attachment.

The most stressed wheel in our system is the driven wheel. We've already fixed the problem with the driving wheel of the scissor mechanism and now it is time to look at the drive LEGO Mindstorms wheel.

Construct two legs for both sides of the robot. The task for this video is to attach this two legs on both sides and to build a system of gears and axles that power those legs.

The important task before the solution. If you haven't done it already, then attach a new axle at the front of the robot and extend the construction with gear wheels and axles to reach the two legs at the two sides of the robot.

Here is our solution for preventing torsion and bending of the LEGO Mindstorms EV3 axles.

We have to admit. This is quite an interesting missions. There is a Manhole cover and it must be turned upside down. Well, the robot must turn it. Again LEGO Box Robot Three With Large Wheels and Thee light sensors and one Gyro is used as a base for the Robot.

Two missions in one. This attachment accomplishes the Hydrodynamics Fountain and Faucet missions from the FIRST LEGO League Hydrodynamics 2017-2018 competitions. The attachment shows a really interesting and widely used approach of a single attachment that is used for two, three and even more missions. This is a standard practice for many of the advanced teams, especially those that reach the finals. The based of the robot is the LEGO Box Robot Three With Large Wheels and Thee light sensors and one Gyro

These are building instructions for an attachment accomplishing the FIRST LEGO League 2017-2018 Slingshot mission. The based of the robot is LEGO Box Robot Three With Large Wheels and Thee light sensors and one Gyro

Here is another great example of a large multi-purpose attachment used in FIRST LEGO League competitions. This one is specifically for the 2017-2018 Hydrodynamics competitions and is doing a number of missions. (01) Pipe removal, (06) Water Treatment and (08) Manhole cover.
The attachment consists of two parts. The first part is placed on the robot while the second part is in front of the robot and the robot pushes it. While working on the field the robot leaves the second part on the Water Treatment plant and when returning back collects it back and returns to base.
The goal of the attachment is for you to build it and experiment with it with the existing field. Use Box Robot 2 as a robot base on which to add the attachments.

FIRST® LEGO® League mission requirements need to be achieved by your robot through its programs and its use of equipment. You’re allowed to hand-rescue your robot, but that does cause this penalty. Be sure to pay extra attention to the rules where they talk about “Interruptions"
(mission descriptions source https://www.first-lego-league.org/)

This is the attachment of Team "Nightbeast", with which they do:
M11–Escape Velocity and M13–Observatory
The Observatory result depends on the model. Sometimes the pointer is in the orange area otherwise in the white area.