Part four of the Catapult series is again about loading the catapult automatically but this time using EV3 brick, motor and sensor. We use a gear system with a medium complexity along with a "standard clutch" available in the LEGO Mindstorms EV3 kits. As a result, at the end of the video, the Catapult loads and fires automatically.
- #68
- 25 Jan 2015
- 8:36
- LEGO MINDSTORMS, LEGO MINDSTORMS NXT, LEGO MINDSTORMS EV3
- Shoot, Lever, Gears, EV3, Nxt, Fun, Construction
Automatic Loading
In this video lesson of the Catapult series a motor for loading the catapult is added. Firing is achieved using gravity force while loading is achieved with a motor. The power from the motor is transferred to the lever by a system of gears located on different axles. In this way the orientation of the gears is changed twice and transmitted four times.
Touch Sensor
The touch sensors used in the robot are very important. We should have a way to find out if the Catapult is already loaded and when we should stop loading. Configuring the motor to use rotations or degrees is a very bad practice and we should try to avoid it. Always try to use sensors.
Additional video lessons
You could find more explanations about changing gear orientation in the following video lessons:
Active attachment for changing gears orientation
Active attachment for changing gears direction - part 2: improving durability
Active attachment for changing gears direction - part 3: moving up&down
All episodes from the series:
How to use the Ultrasonic Sensor with the Catapult built from EV3/NXT (Part 5)
Catapult build from LEGO Mindstorms EV3/NXT (Part 4 - EV3 clutch and loading)
Catapult build from LEGO Mindstorms EV3/NXT (Part 3 - Automatic loading)
Catapult build from LEGO Mindstorms EV3/NXT (Part 2 - Base)
Catapult build from LEGO Mindstorms EV3/NXT (Part 1)
Robotics Set
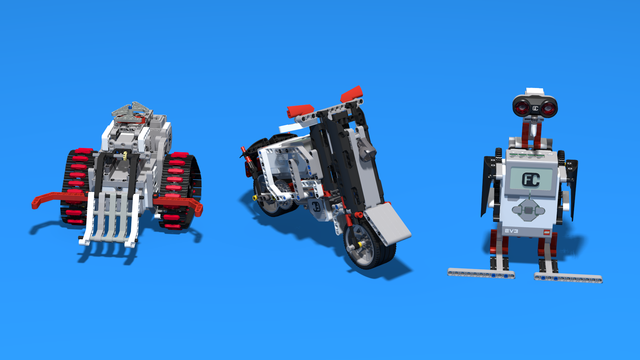
The current video lesson shows the robot built from LEGO Mindstorms EV3 parts.
Catapult Frame - LEGO Mindstorms construction for a frame of a catapult
This frame holds the motor and ev3 brick used in the catapult. The frame is placed on top of the rotating base and thus could be easily rotated. The brick could be both NXT and EV3

![]()
Catapult Rotating Base - LEGO Mindstorms construction for a base for a catapult
This is the initial construction of a catapult. The base on which we will place the rest of the robot. The goal of this construction is to give the catapult the ability to rotate.

![]()
EV3-G Program for the Motor and Touch Sensor of the LEGO Catapult
This is an LEGO Mindstorms EV3-G program for the motor and touch sensor that we use for the LEGO Catapult

![]()
LEGO Catapult EV3-G program
Mindstorms EV3-G program for running the LEGO catapult robot
![]()
English
In the fourth episode of the series on how you can build your own catapult we'll use an EV3 Mindstorm set and the motor and touch sensor from the set. In the previous episode we did the same thing with the NXT construction so, check it out. And at the end of the lesson we will have a completely automatic catapult that can fire like this. Fire, load; fire again, load.
The starting point is again the manual catapult that we have - we load manually, we fire manually. We load manually, we fire manually. We can also turn the catapult in each direction. The first thing that I'd like to do is to remove the NXT brick and add an EV3 brick in its place. So, it's quite straightforward. Just remove one brick and add the other one. They are compatible.
Like this. And, again, it is firing manually. As in the previous video, we should somehow attach a motor on one side and a touch sensor on the other side of the construction. The first thing will be to add this large gear wheel to the axle of the lever. In this way, when we turn the gear wheel, we'll load the catapult. When we release it, we'll fire. And we can do it even from this side. How do we transfer power from an EV3 motor to this gear wheel? In the previous episode we developed a clutch on our own but in the EV3 version of the robot we have the clutch already there. It's this small red part here. And the purpose of this part is to make this grey gear wheel turn. When the clutch is on, we attach the gear to the motor and when the clutch is off, the gear can move freely. As you can see, now the clutch is off and we can move the gear. But when the clutch is on, we can't move the gear, as it requires a move by the robot. You can find detailed instructions on how to build this module below the video, so check them out. But the basic principle is that you need a clutch and in some situations the clutch is on and in others the clutch is off. The other interesting thing about this module is that we have a change in the orientation of gears. We have gears that are, let's say, horizontal here and vertical here.
Now we attach the module to the robot.
Like this. Then the next step is to add the touch sensor. The purpose of the touch sensor is to make sure that the motor stops moving when the catapult is loaded. So, we are loading the catapult and when the catapult is loaded, we must stop moving. We are not loading the catapult based on rotations; based on degrees, but we are loading the catapult until the touch sensor is pressed. So, we add this touch sensor here
Now the clutch is off. We are loading. The clutch is on. And the catapult is already loaded. If we release the lever, we fire. The last thing that we'll do is to improve this lever. We'll need the clutch to be on after firing so that we can again load it automatically. To do this, we'll just add a small modification to the lever.
Now, the clutch is off, we are loading; the clutch is on and if we fire the catapult, it will automatically bring the clutch back into the ON position and we'll reload the catapult.
Let's now connect the cables.
The motor should be connected to port C
and the touch sensor - to port 2. Now let's write the program. The program is pretty straightforward. We take a medium motor. We'd like to move the motor endlessly
with a power of, let's say, minus 100 because we're moving in the other direction and we are moving the robot until the touch sensor is pressed, so we are waiting. And we are waiting for the touch sensor to compare its state. The state of the sensor should be "pressed". We are waiting for a pressed sensor, as you can see, State 1. After the sensor is pressed, we stop the motor
and then we wait till the sensor is released. This is the moment when we push the lever up; we release the sensor and we fire a part.
The state for "release" is Zero and again we wait for about a second for the firing to complete and we put all this in a loop. You can find the program below the video. Feel free to download it. Let's see how it performs. We start the program from the EV3 brick. Press "Start". The catapult is loaded - like this. Let's turn it to the camera. Now we release the lever. We fire, then we load again. We release the lever; we fire. Let's see what happens on the side of the touch sensor. We release the lever; we load until the touch sensor is pressed; we again release; we load. That's for our catapult. Try to improve it. Try to make it fire parts even further. This one fires part to about 1m, 1.5 m. We'll welcome any comments, improvements, modifications that you've done to this robot.
Courses and lessons with this Tutorial
This Tutorial is used in the following courses and lessons
A Robot A Day Keeps The Questions Awake
"How to use the LEGO robots to facilitate the learning of robotics by my student at home" or simply put - "what to build now?"
After enrolling in this course we will send you a few (1-2-3) emails each month with a title "A robot a 'day'". Each email contains a robot building instructions and/or video tutorials and/or tasks that should be accomplished. After a task is accomplished we might sometimes ask for a video or picture.
This process gives a structure of the learning process where you can learn from the content. The student participates in a course, but from home and on the schedule that you decide.
- 26
- 98:39
- 47

Have fun throwing objects with a Catapult. Robot 9
If you've come this far in the course you deserve a big award. Presenting to you the Catapult (that, by the way, has a clutch).
First, you could see the end construction of this section and then we could enter into details. And we would even use a Clutch.
- 5
- 0
- 2
- 3d_rotation 1